Premiere Pro tips… putting in place an optimum lighting setup
Whatever you’re filming, from a simple interview to a feature film, lighting is hugely important to getting good quality footage to work with and setting the right mood.
Three-point lighting setup
The most basic lighting in film is the three-point lighting setup. Lighting from three directions – positions of key, fill and back – shapes your subject and sets it apart from the background. It’s astonishing how many video productions, including the biggest dramas and feature films, use this simple setup.
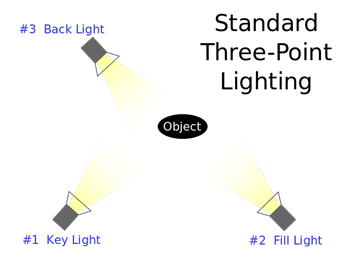
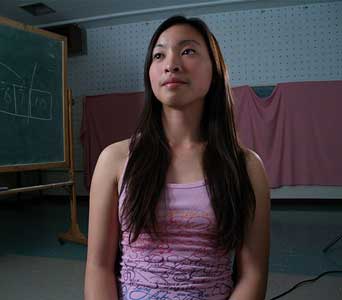
Here’s an example showing typical results:
Working with little or no budget
If you’re just starting out as a videographer with a very low budget and no access to third-party lights, the key thing is to make the most out of what you have available. With that in mind, you’ll either have to use natural light, existing artificial light or a combination of the two.
The implication of this is that you’ll have to film in daylight using the sun as your main (key) light. Try to turn your subject forty-five degrees to the key light, so it is never directly in front of or behind it, to prevent squinting or silhouetting respectively. The colour of natural light varies depending on the time of day, but in general it produces a more orange hue.
Next, let’s consider the fill light. “Fill” literally means to fill in the gaps not lit by your key light.
If you have any fixed lights in the area you’re working with, try experimenting with them. Most office lights are downlights. They are useful for boosting the ambient light levels but can cast ugly shadows down over a person’s features, so try not to position people directly underneath them. Again, the colour of office light varies from building to building, but in general it produces a more yellow hue.
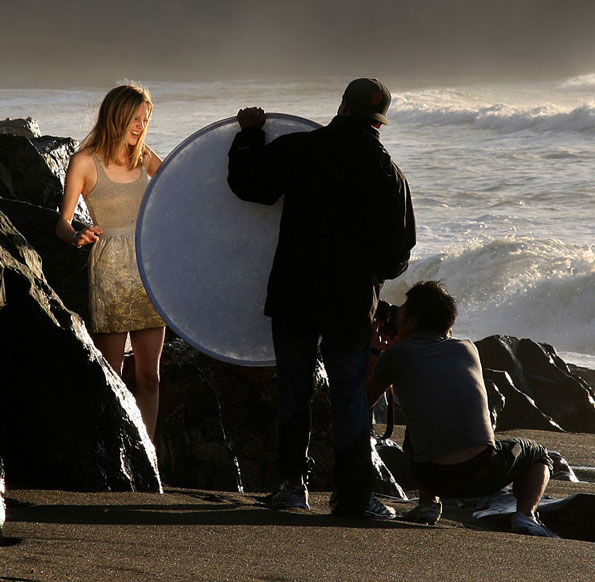
Existing portable lights, such as desk lamps, can also be useful as fill lights. They are often anglepoise, and as such can be easily directed. The fill should be positioned at least ninety degrees to your key light and set at about 50% of the key light. In the absence of portable lights, consider using a reflector. Ready-made reflectors can be bought online for less than £10. Alternatively, a large block of polystyrene can provide a makeshift reflector to create your fill.
The same techniques of portable lights and reflectors can be used to create a back light, should you feel you need one.
The completes our three-point lighting setup, at little or no cost. Here’s a typical example of such a setup…
And when you have a budget…
… LED light kits with stands should be your first purchase. These are extremely reasonably priced these days, and their batteries are usually the cheap rechargeable camcorder style that hold their charge for a long time. LEDs are also dimmable as standard these days, and produce huge amounts of controllable white light.
One other problem which is rarely addressed is the issue of too much light. This can be quite easily fixed, sometimes by simply pulling blinds down, or turning off overhead lights. In a situation where this is not possible, the solution is to flag off the light. A flag is simply something which can reduce the amount of light by cutting into it, and you can use any kind of rigid board as a flag; try painting a large slab of polystyrene, wood or cardboard black.
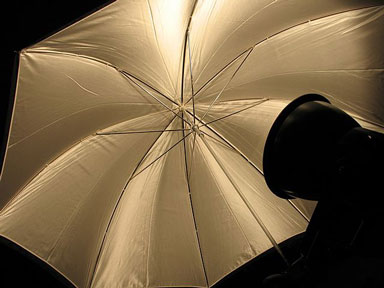
Related to flags is diffusion. This is a means of softening (diffusing) the light from a source, much like a net curtain does to a window. As well as nets, simple tracing paper or even baking paper clamped over an LED can reduce the harshness of the source.
Remember that you can use an LED setup completely independently or in conjunction with other light sources and, while the same three-point lighting principles still apply, you might have to tweak your colour settings in Premiere Pro to balance the white LED light with the orange of natural light and yellows of office lights.
Try learn and practising these simple tricks and the look of your video production will suddenly start to improve greatly.
Good luck and enjoy!
Chris
Armada offers Premiere Pro training to users at all levels. See Introduction to Premiere Pro and Intermediate/Advanced Premiere Pro.








Leave a comment